Goal: Add a little more clearance, stiffen up for adding weight during the build, and not blow the budget in the process. There are so many options for upgrading suspension while downgrading your wallet that it was almost overwhelming. We went back to the principles of the build, how the truck was to be used and didn’t get too exotic with any of this!
Build Time: Approx. 25hrs
Cost: Approx. $1,750
Front and Rear Suspension:
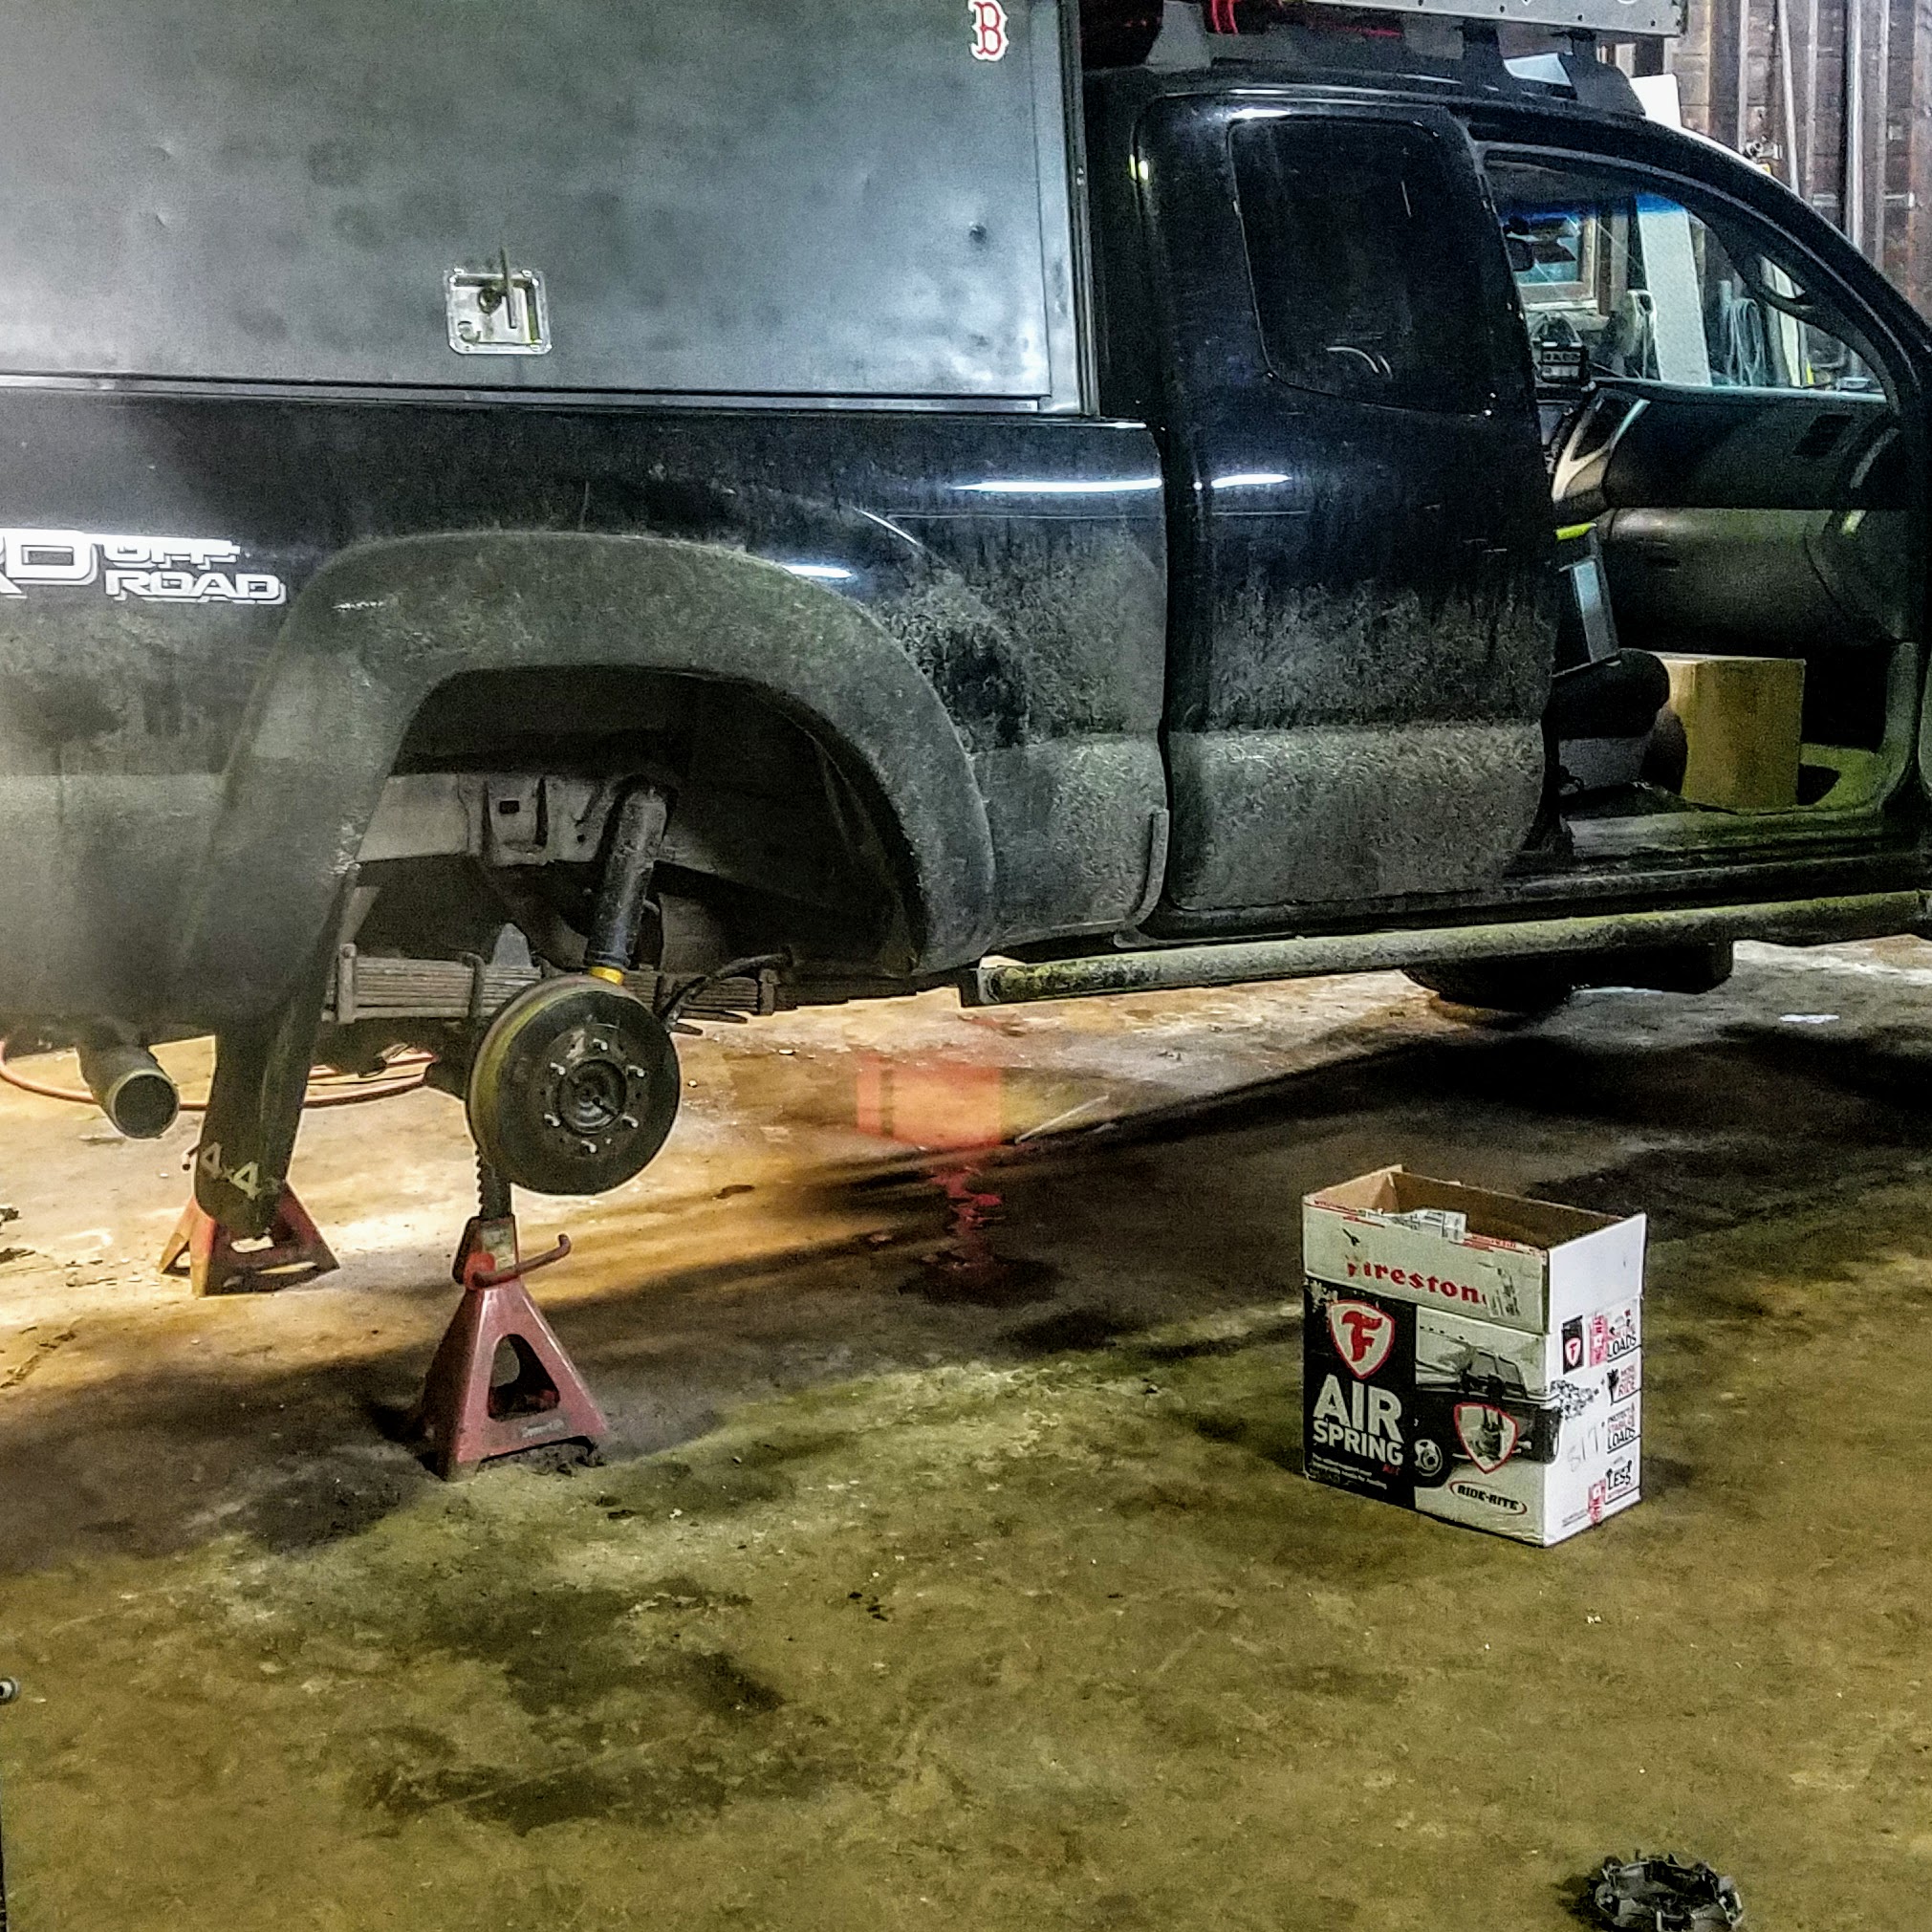
I think suspension might have been the most stress-inducing decision of the build. So many options to choose from, and it can quickly spiral into a mountain of cash! The crew at OK4WD confirmed my initial plan, and we bought the basic Old Man Emu 2” kit with heavy duty Dakar rear springs which gave us an increase of 220lbs-300lbs capacity in the back.
We divided and conquered the install and Lindsay took the front end while I dealt with the leaf springs in the back. At this time the truck was only a year old, so we, fortunately, did not have to deal with any sort of rust issues. The front end is straightforward with just a replacement of your struts and springs. The responsible thing to do is install the springs with a spring compressor and a vice. I can, however, confirm, that two people, a floor jack, and some redneck ingenuity can complete the install by using the truck as a counterweight to compress the coilover.


[Click images to open for all galleries]
The rear spring install went according to plan as well, and there are plenty of how-to videos on YouTube so I won’t go into details here. One thing to note – make sure you read the instructions on which bushings you replace and which ones stay on the truck. Instructions ARE essential, otherwise, you lose 3 hours of your afternoon for no reason…
The heavy springs with an additional leaf are STIFF so be prepared for a new truck. You’re basically putting 1-ton springs into a Tacoma, so the ride is a bit different! To be honest, though, the stiffness actually led to a better handling truck on pavement, as long as you are okay with slowing down on rough roads or otherwise risking some dental work.
Air Bags:
We didn’t make it more than 300 miles from home on the initial shakedown before we realized that the truck had a little too much junk in the trunk. With a full load of water, fuel, food, and ski gear we saw that our OME rear springs were as loaded as we were comfortable. The last thing we wanted was to break a spring on rough terrain because of weight. The first mission was to redistribute some weight from behind the rear axle to the cab until we could get home to put the airbags on.
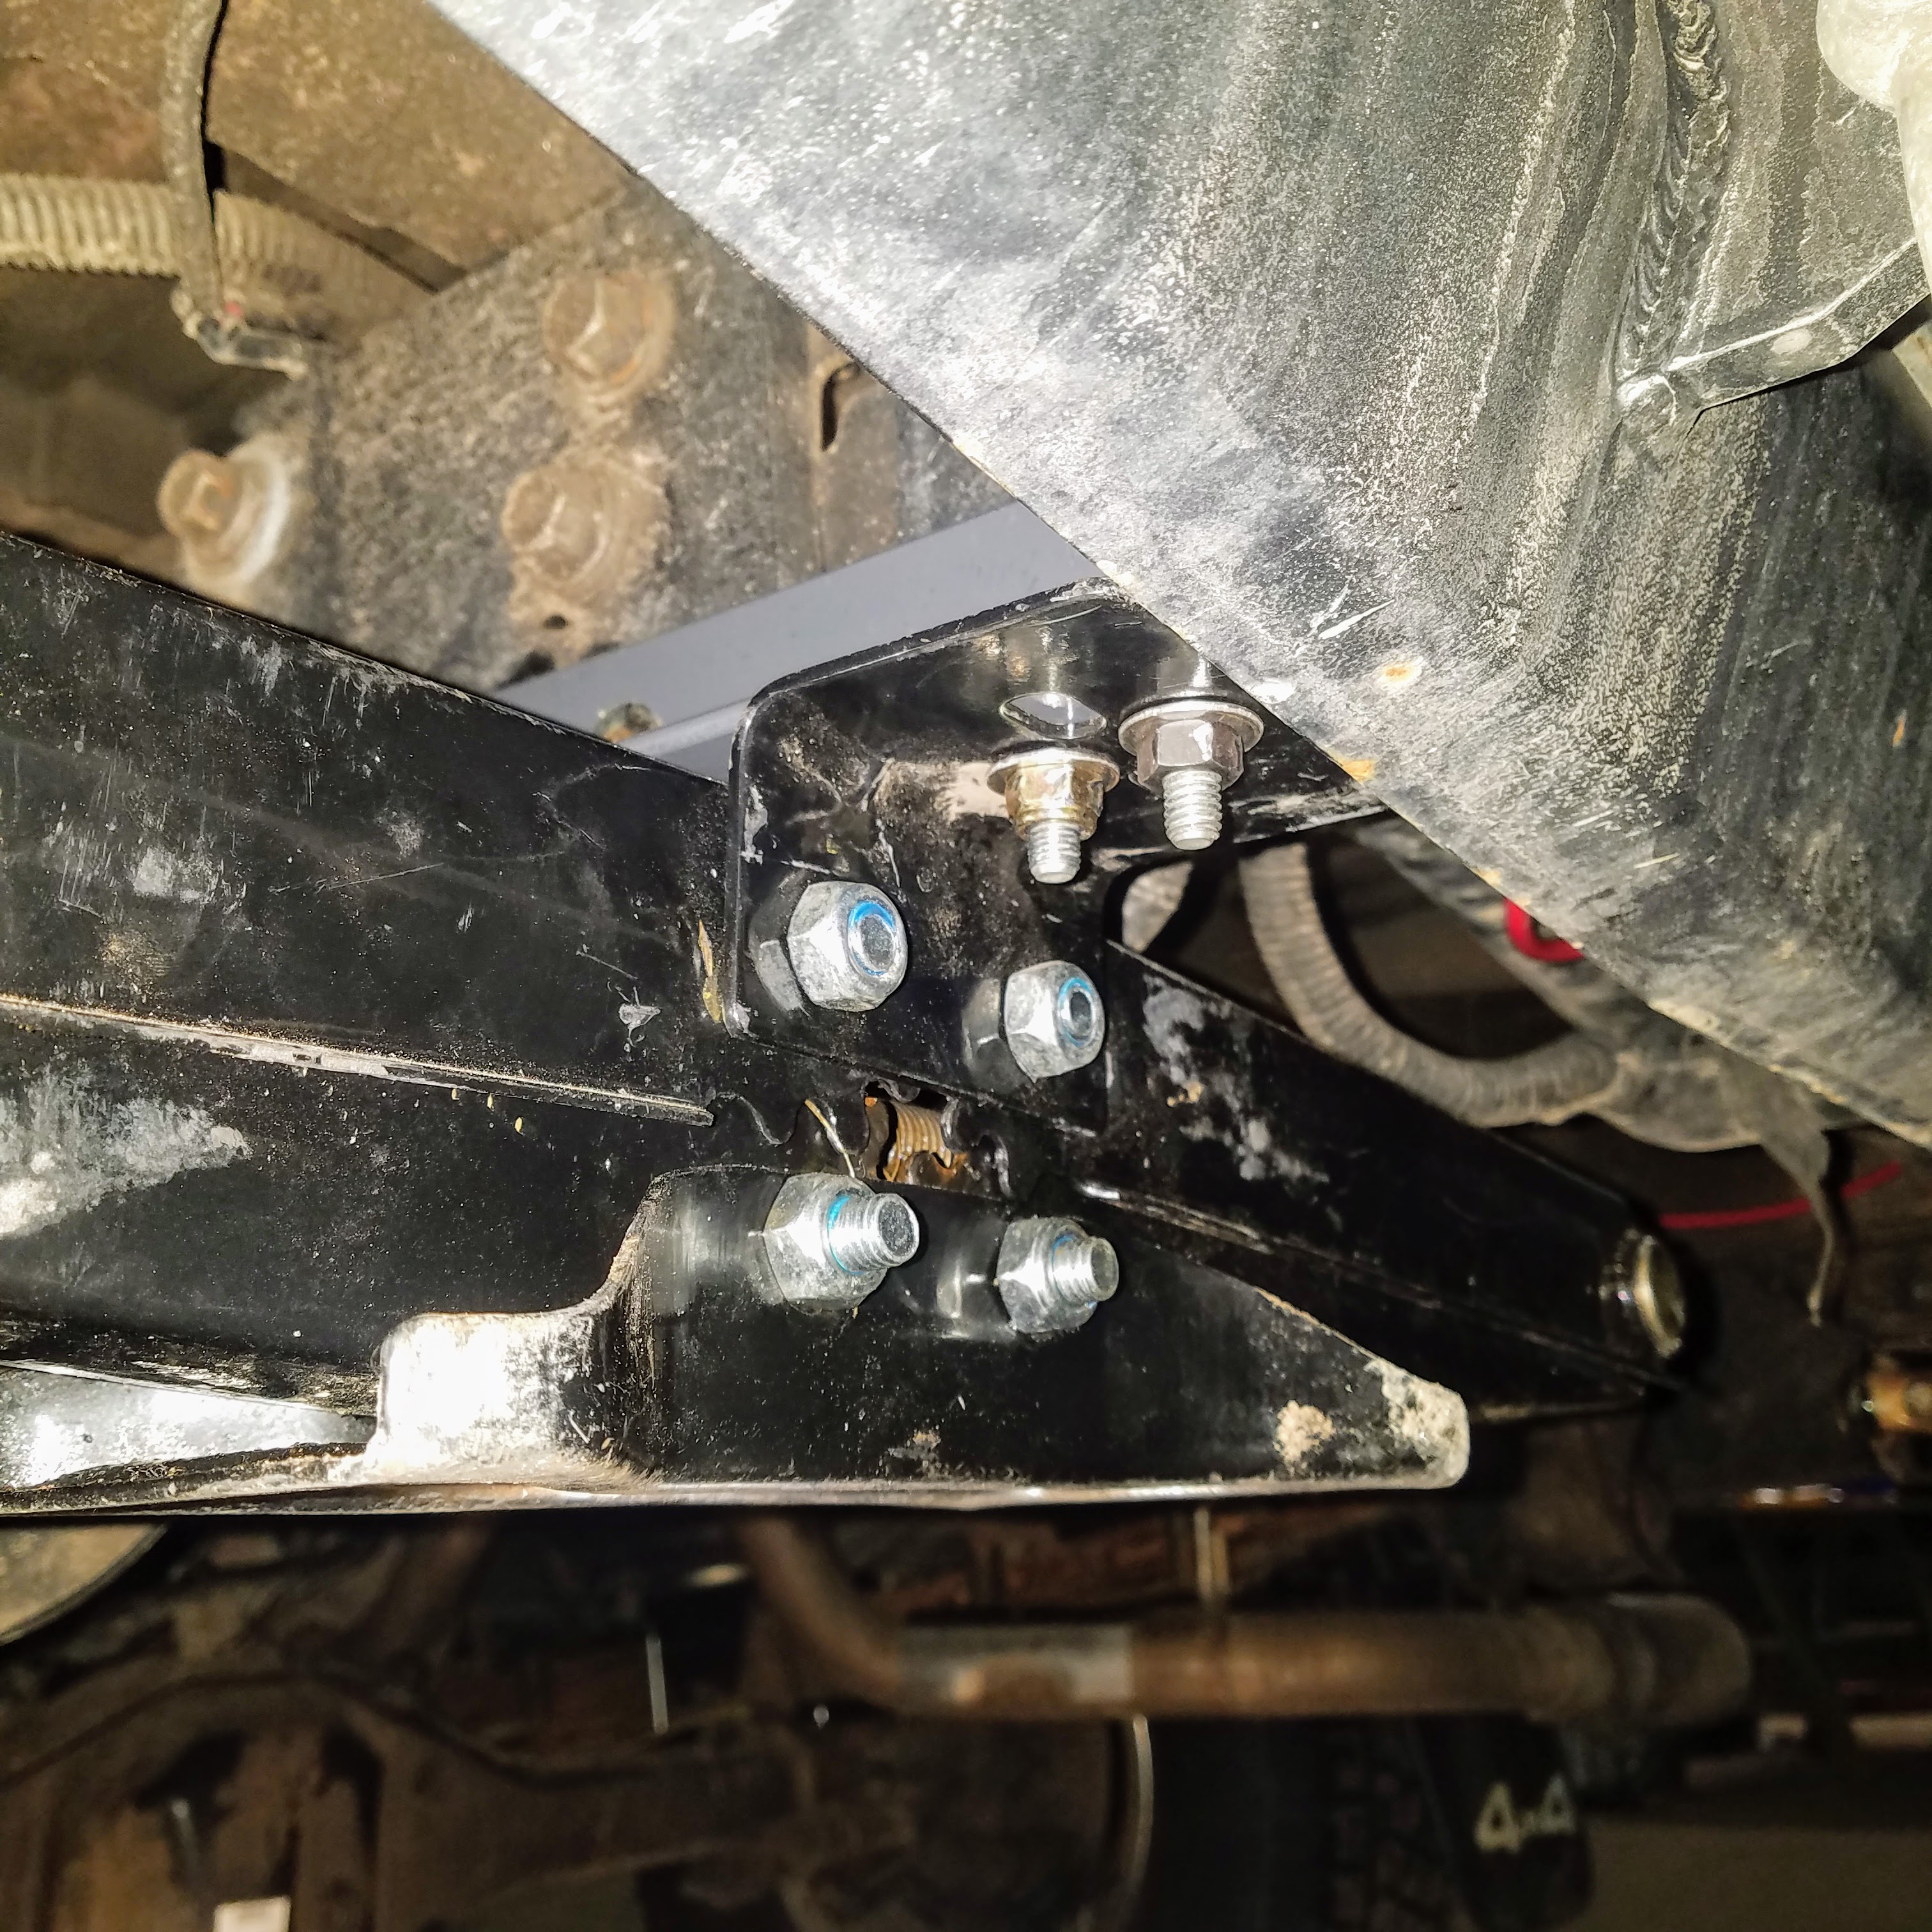
The Firestone Airbag system is pretty idiot proof and would have been about a 2-hour install on a stock truck. The thicker leaf pack of our heavy rear springs added a little complication, but honestly, it was still pretty easy. I traded the OEM grade-2 bracket bolts (basically a u-bolt) for longer grade-8’s and modified the bracket that goes under the leaf pack. As long as you have access to a grinder, you can take the brackets from the box and repurpose them without compromising their strength.
If you install these, DON’T RUSH THE AIRLINE INSTALL! Everything is great until you crack a fitting and have to refill one side every 24hrs. Take your time and do the airline install correctly. And if you’re like me, you will still inevitably break something, so I’d recommend going into it with a spare fitting for the airbag. After taking apart the driver’s side airline system a 3rd time and being very careful with reassembly, we can now go several weeks without losing more than a couple PSI.

If anyone wants more detail on installing the Firestone airbags with heavier rear springs, just send us a message, and I’ll send you detailed photos.
Leveling Jacks:
Want to know the least “overlanding” thing about the entire truck? We have two RV scissor jacks from Camping World under the rear bumper. So uncool for hammering the trails… yet so much more comfortable to sleep!
We actually bought these in the first week of the shakedown to take some of the weight off the rear springs when we were all piled into the bed of the truck or in the tent. When the center of gravity of your bed is 4.5 feet above your spring hangers, coughing will make the truck rock side to side (not to mention other things). With the jacks down we can save some wear and tear on the suspension AND actually sleep through the night without wondering if rolling over in your sleeping back is going to tip the truck.
The first 8 weeks had us doing an acrobatic performance of cranking the jacks up while trying to balance with one leg on the ground and the other on top of the jack to keep it from tipping over. What a pain in the ass. Therefore, Getting them mounted to the truck was a high priority when we did the refit for the long trip. Now they are bolted to the frame with a scrap piece of 2×2 angle iron from the initial build, and there’s no more losing balance and falling down in the desert when you’re trying to set up your house. They might look silly, but they are one of the best investments we made!


Thoughts looking back:
The only thing I would have changed was to not put heavy springs on until we were ready to build the truck out. Because of a change in our work plans, the bumpers and springs went on about a year before the rest of the build out. That had us bouncing around New England in a light Tacoma with the suspension of an F350… plenty of capacity for firewood though.
The setup from Old Man Emu was precisely what we were looking for, didn’t need anything more. The only problems with the airbags were self-inflicted, and the leveling jacks are money. 10/10, would repeat all three again.
