Goal: Add some “armor” on the perimeter of the soon-to-be expedition truck that gives added protection from road conditions, animals, and other drivers. Too much armor, and you’re just adding weight and spending money on a truck that is never supposed to be doing any “rock crawling.” Too little armor and the deer that you hit on the highway is going through your radiator and/or window. Plus, they all help you look cool.
Build Time: Approx. 30hrs
Cost: Approx. $5,250
Front and Rear Bumpers:
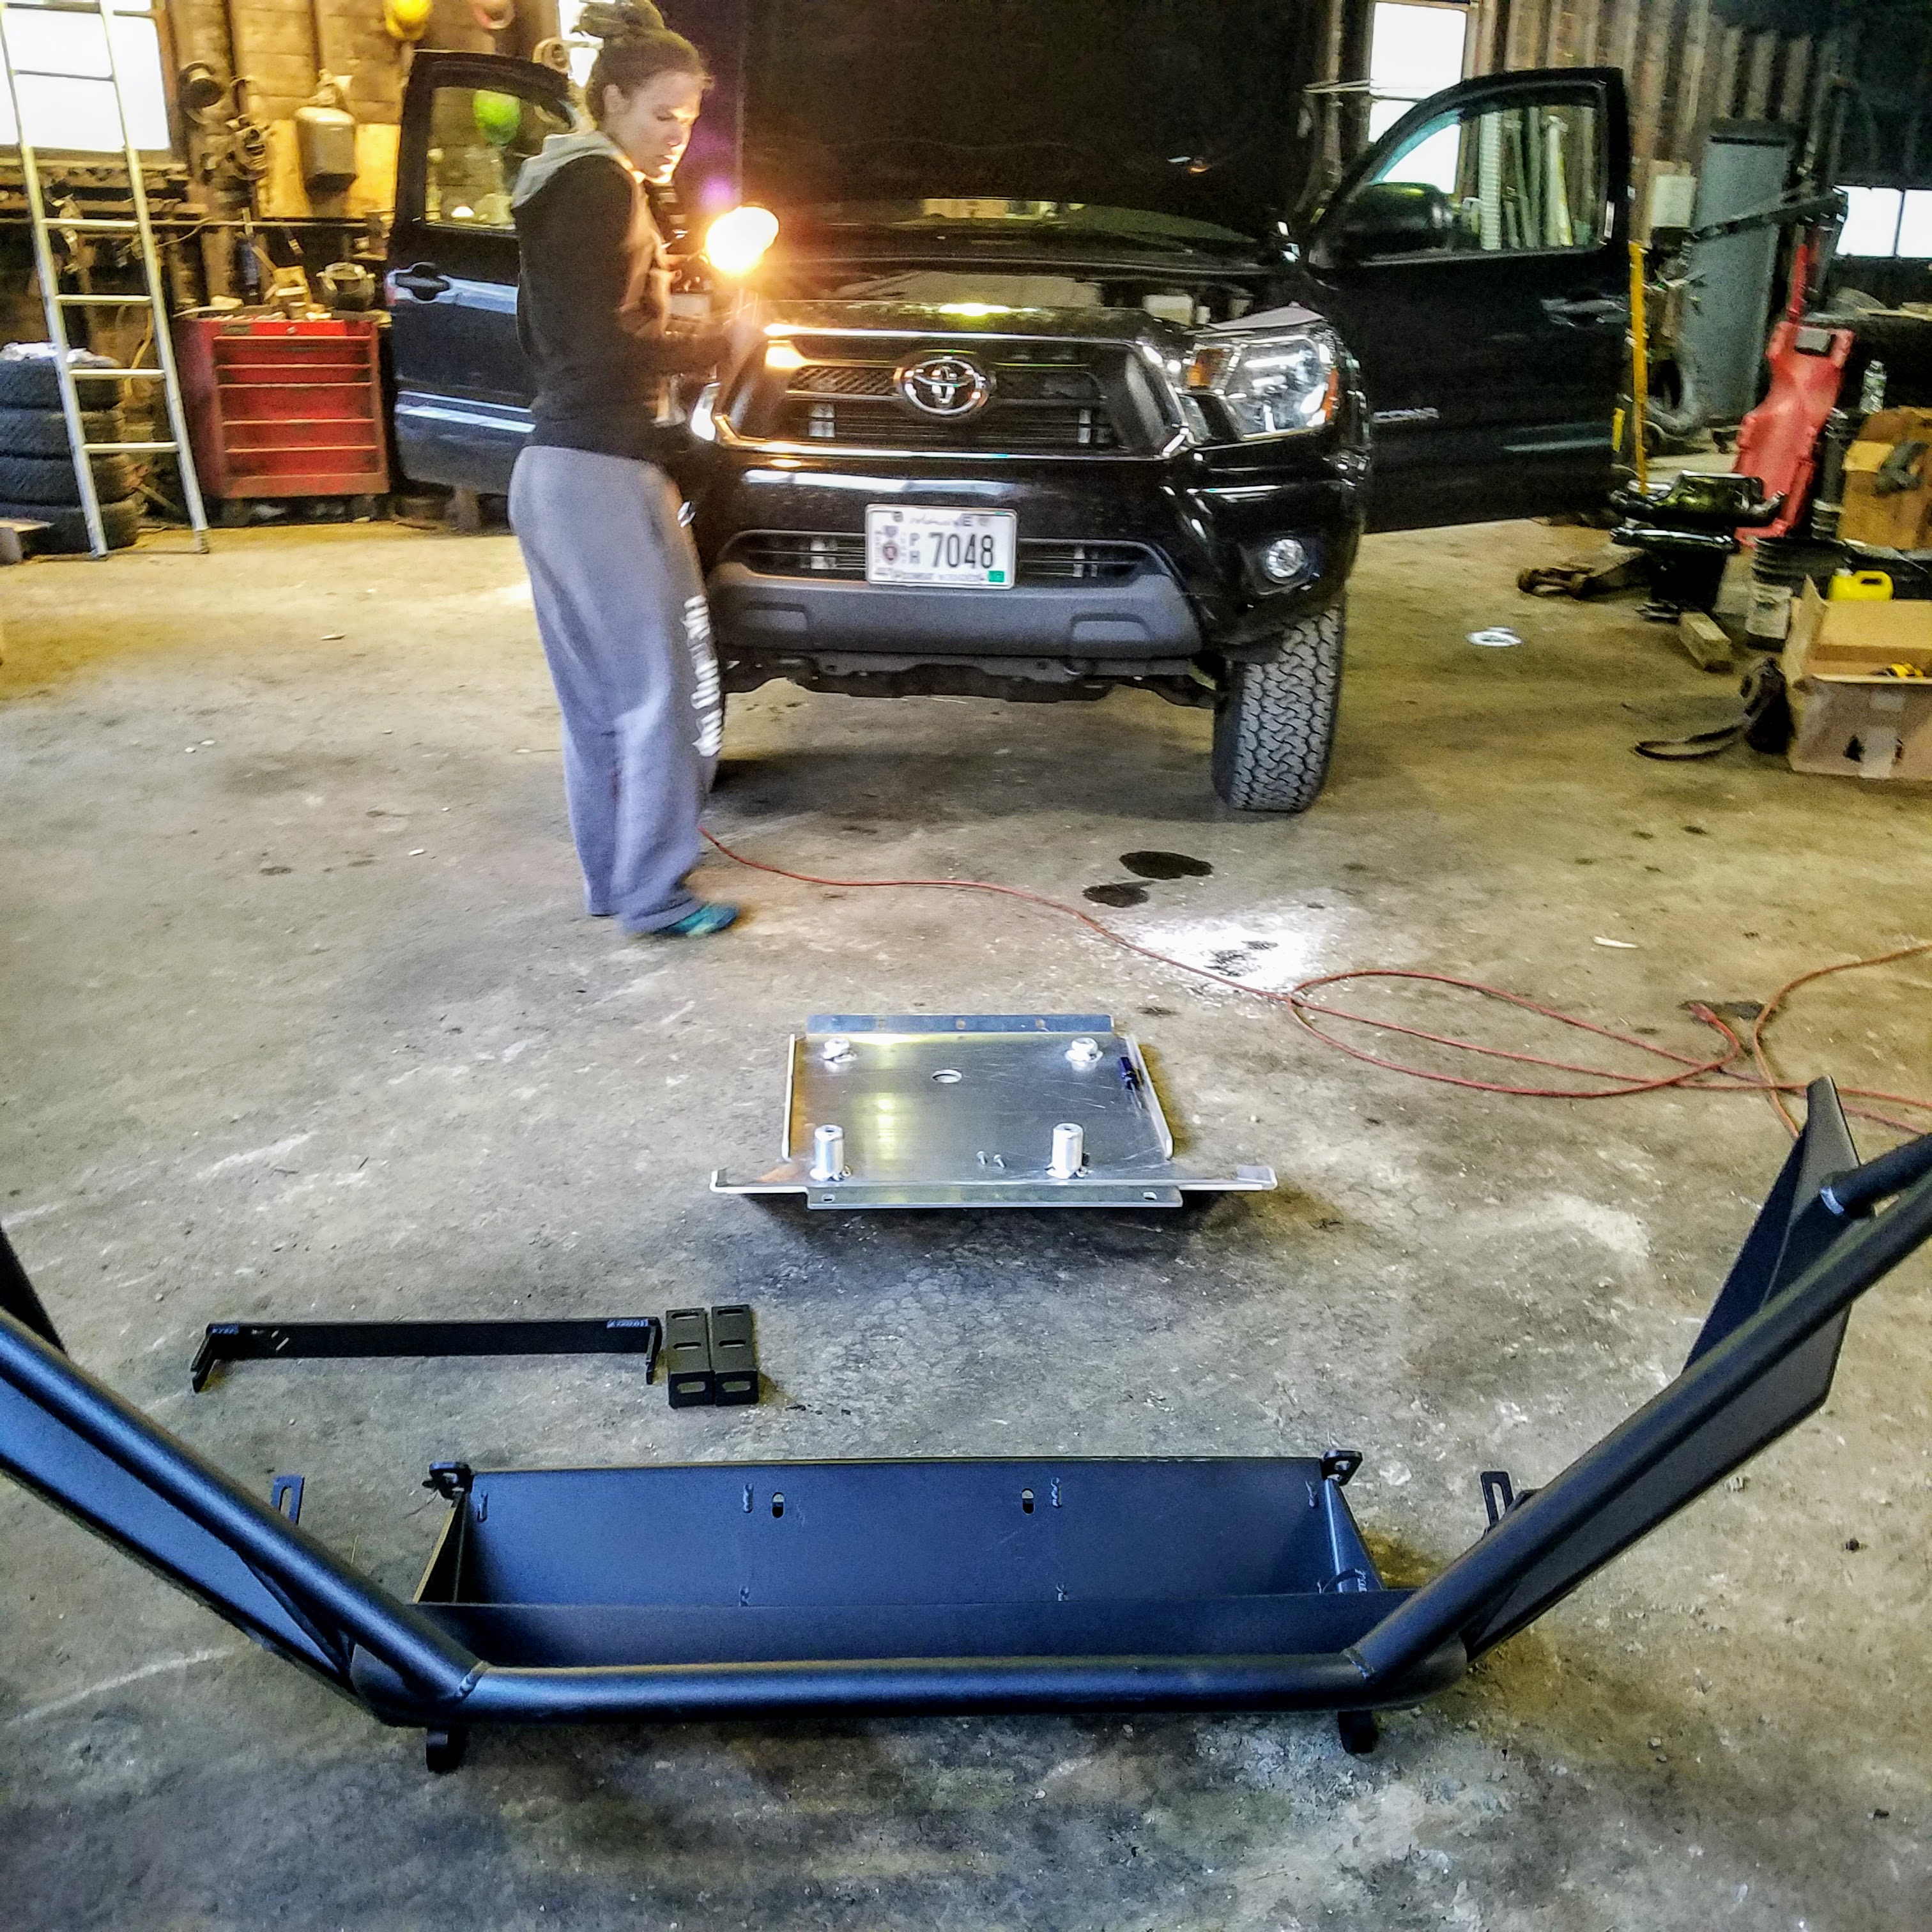
Front bumpers are basically mandatory if you think you’re going to be a cool overlanding truck. ESPECIALLY if you’re going to put it on Instagram! Yes, they provide a useful function… but obviously, that’s secondary.
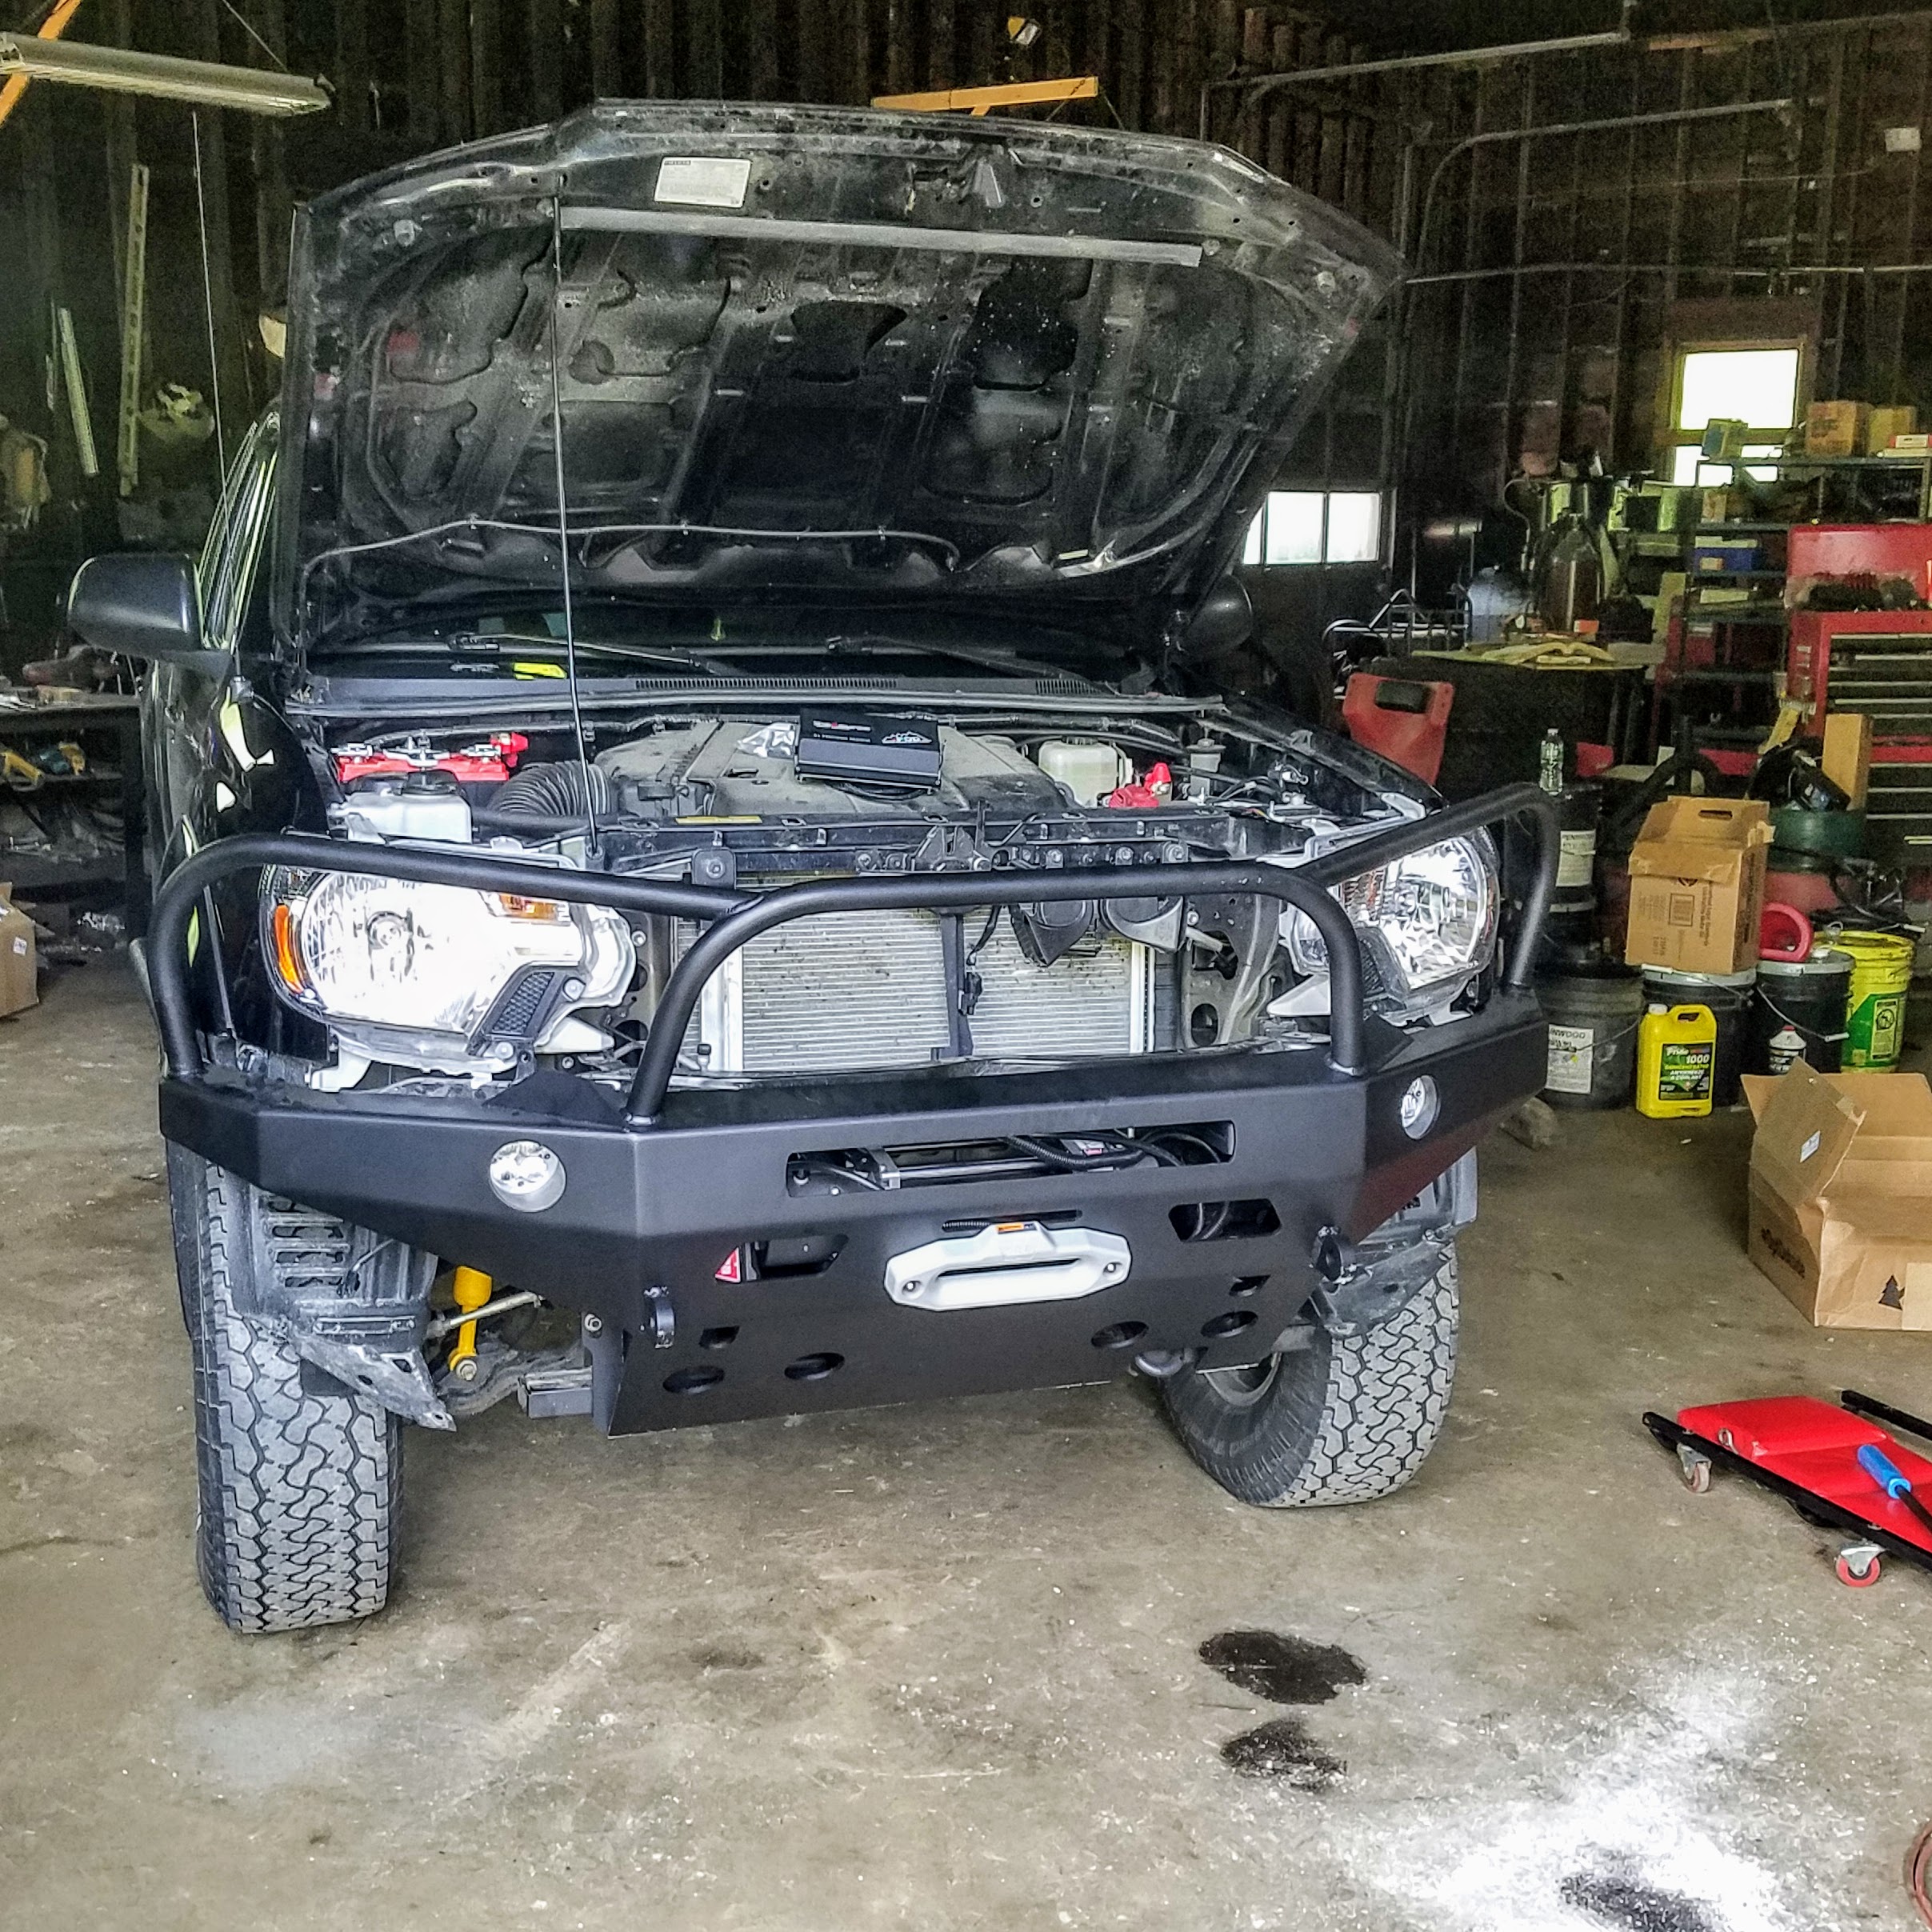
We went with a Pelyfreybilt aluminum front bumper with a standard mounting bracket for a Warn winch and 20” light bar. The lightweight benefits of aluminum far outweighed the added cost, as we knew early on that every added pound was going to matter. Wanting to prevent damage to the truck from animal impacts, we went with a full bumper with lightbar hoops. A little “louder” than most, but the thought was to have as much protection as possible.
Installing the front bumper itself was as easy as could be. The factory components that needed to be removed were mostly all plastic molding held on by clips that we broke half of trying to take off. The new bumper bolted to a set of studs that formerly held the aluminum crush bar, which initially protected the radiator from a head-on crash. With the bumper on the frame studs, getting it situated took a bit of precision. Leveling the left and right sides of the bumper to both the ground and the body took more time than any of the prep, and if it were not for wiring in lights and a winch, it would have been a quick half-day job. The lighting made things a bit more complicated, which you can read about in a couple more weeks!


[Click images to open for all galleries]
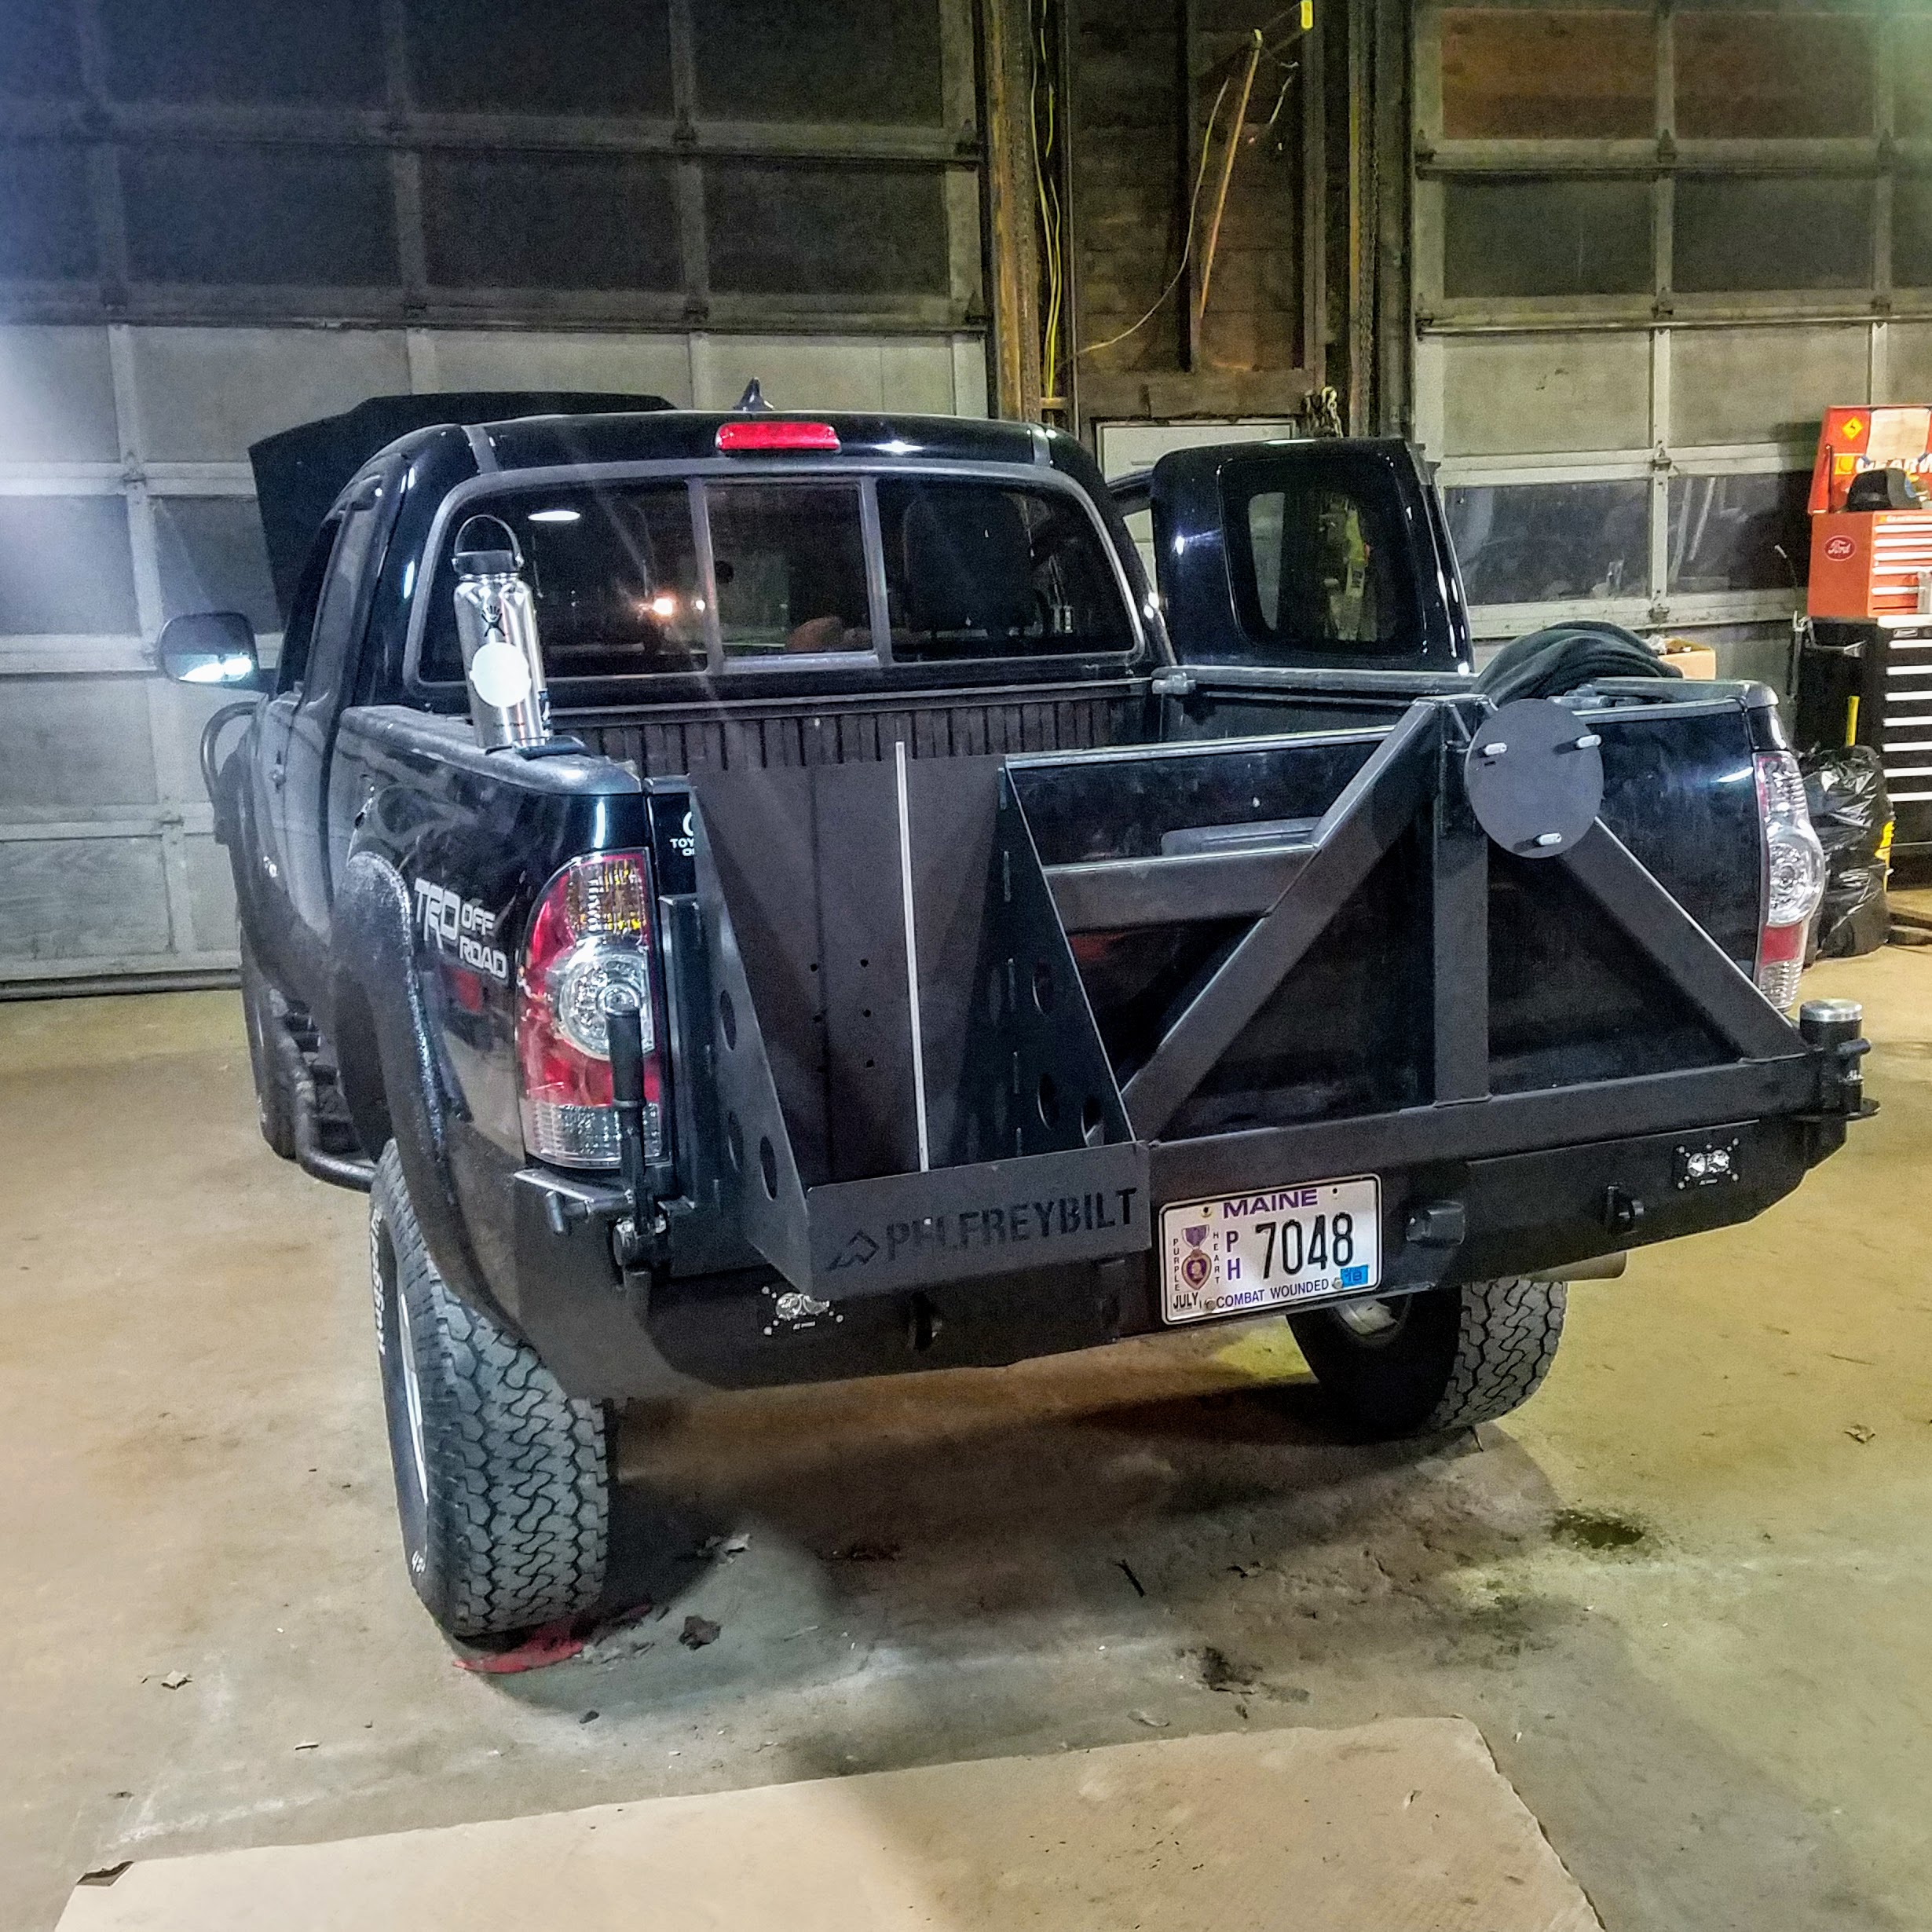
The rear bumper also came from Pelfreybilt and went on a few months after the front. [Side note: our rear bumper shipped about 2 weeks before they declared bankruptcy and reneged on all orders/deposits. Phew!]
We wanted to have a conceptual design of the living compartment before buying a rear bumper to avoid functionality conflicts. Not wanting to carry reserve fuel in temporary storage inside the living compartment (fumes, fire risk, etc.), we went full-on with a swing arm steel bumper and bracket for the spare tire and two 5-gallon jerry cans. Like most products from Pelfreybilt we bought, there are no complaints from me with this bumper. Everything works as billed, including the lock system for the jerry cans and latching mechanism for the swing arm. The only problem is weight; both the steel base and swing arm are HEAVY, not to mention it’s a lot of weight sitting four feet behind the rear axle.
Installing the rear bumper was only slightly more complicated than the front. Because of the swing arm blocking its view, the backup camera needed to come out of the tailgate. A quick YouTube video and 30 minutes of work had the camera dangling from its wiring harness. Since the tailgate wouldn’t be needed with the capper on, we ditched it into the “sell pile” soon after the bumper install. The disassembly started with removing the factory trailer hitch and chrome bumper, which was just a few simple bolts to pop out and reuse for mounting the Pelyfrybilt steel bumper. The license plate bracket and swing gate assembly was relatively intuitive, which was good because we lost the instructions at some point mid-installation. Carefully packing the bearings made for the only time-consuming part of the entire rear bumper process. All-in-all, it was about 6 hours from start to finish for a badass (albeit heavy) swing arm rear bumper.


Sliders:
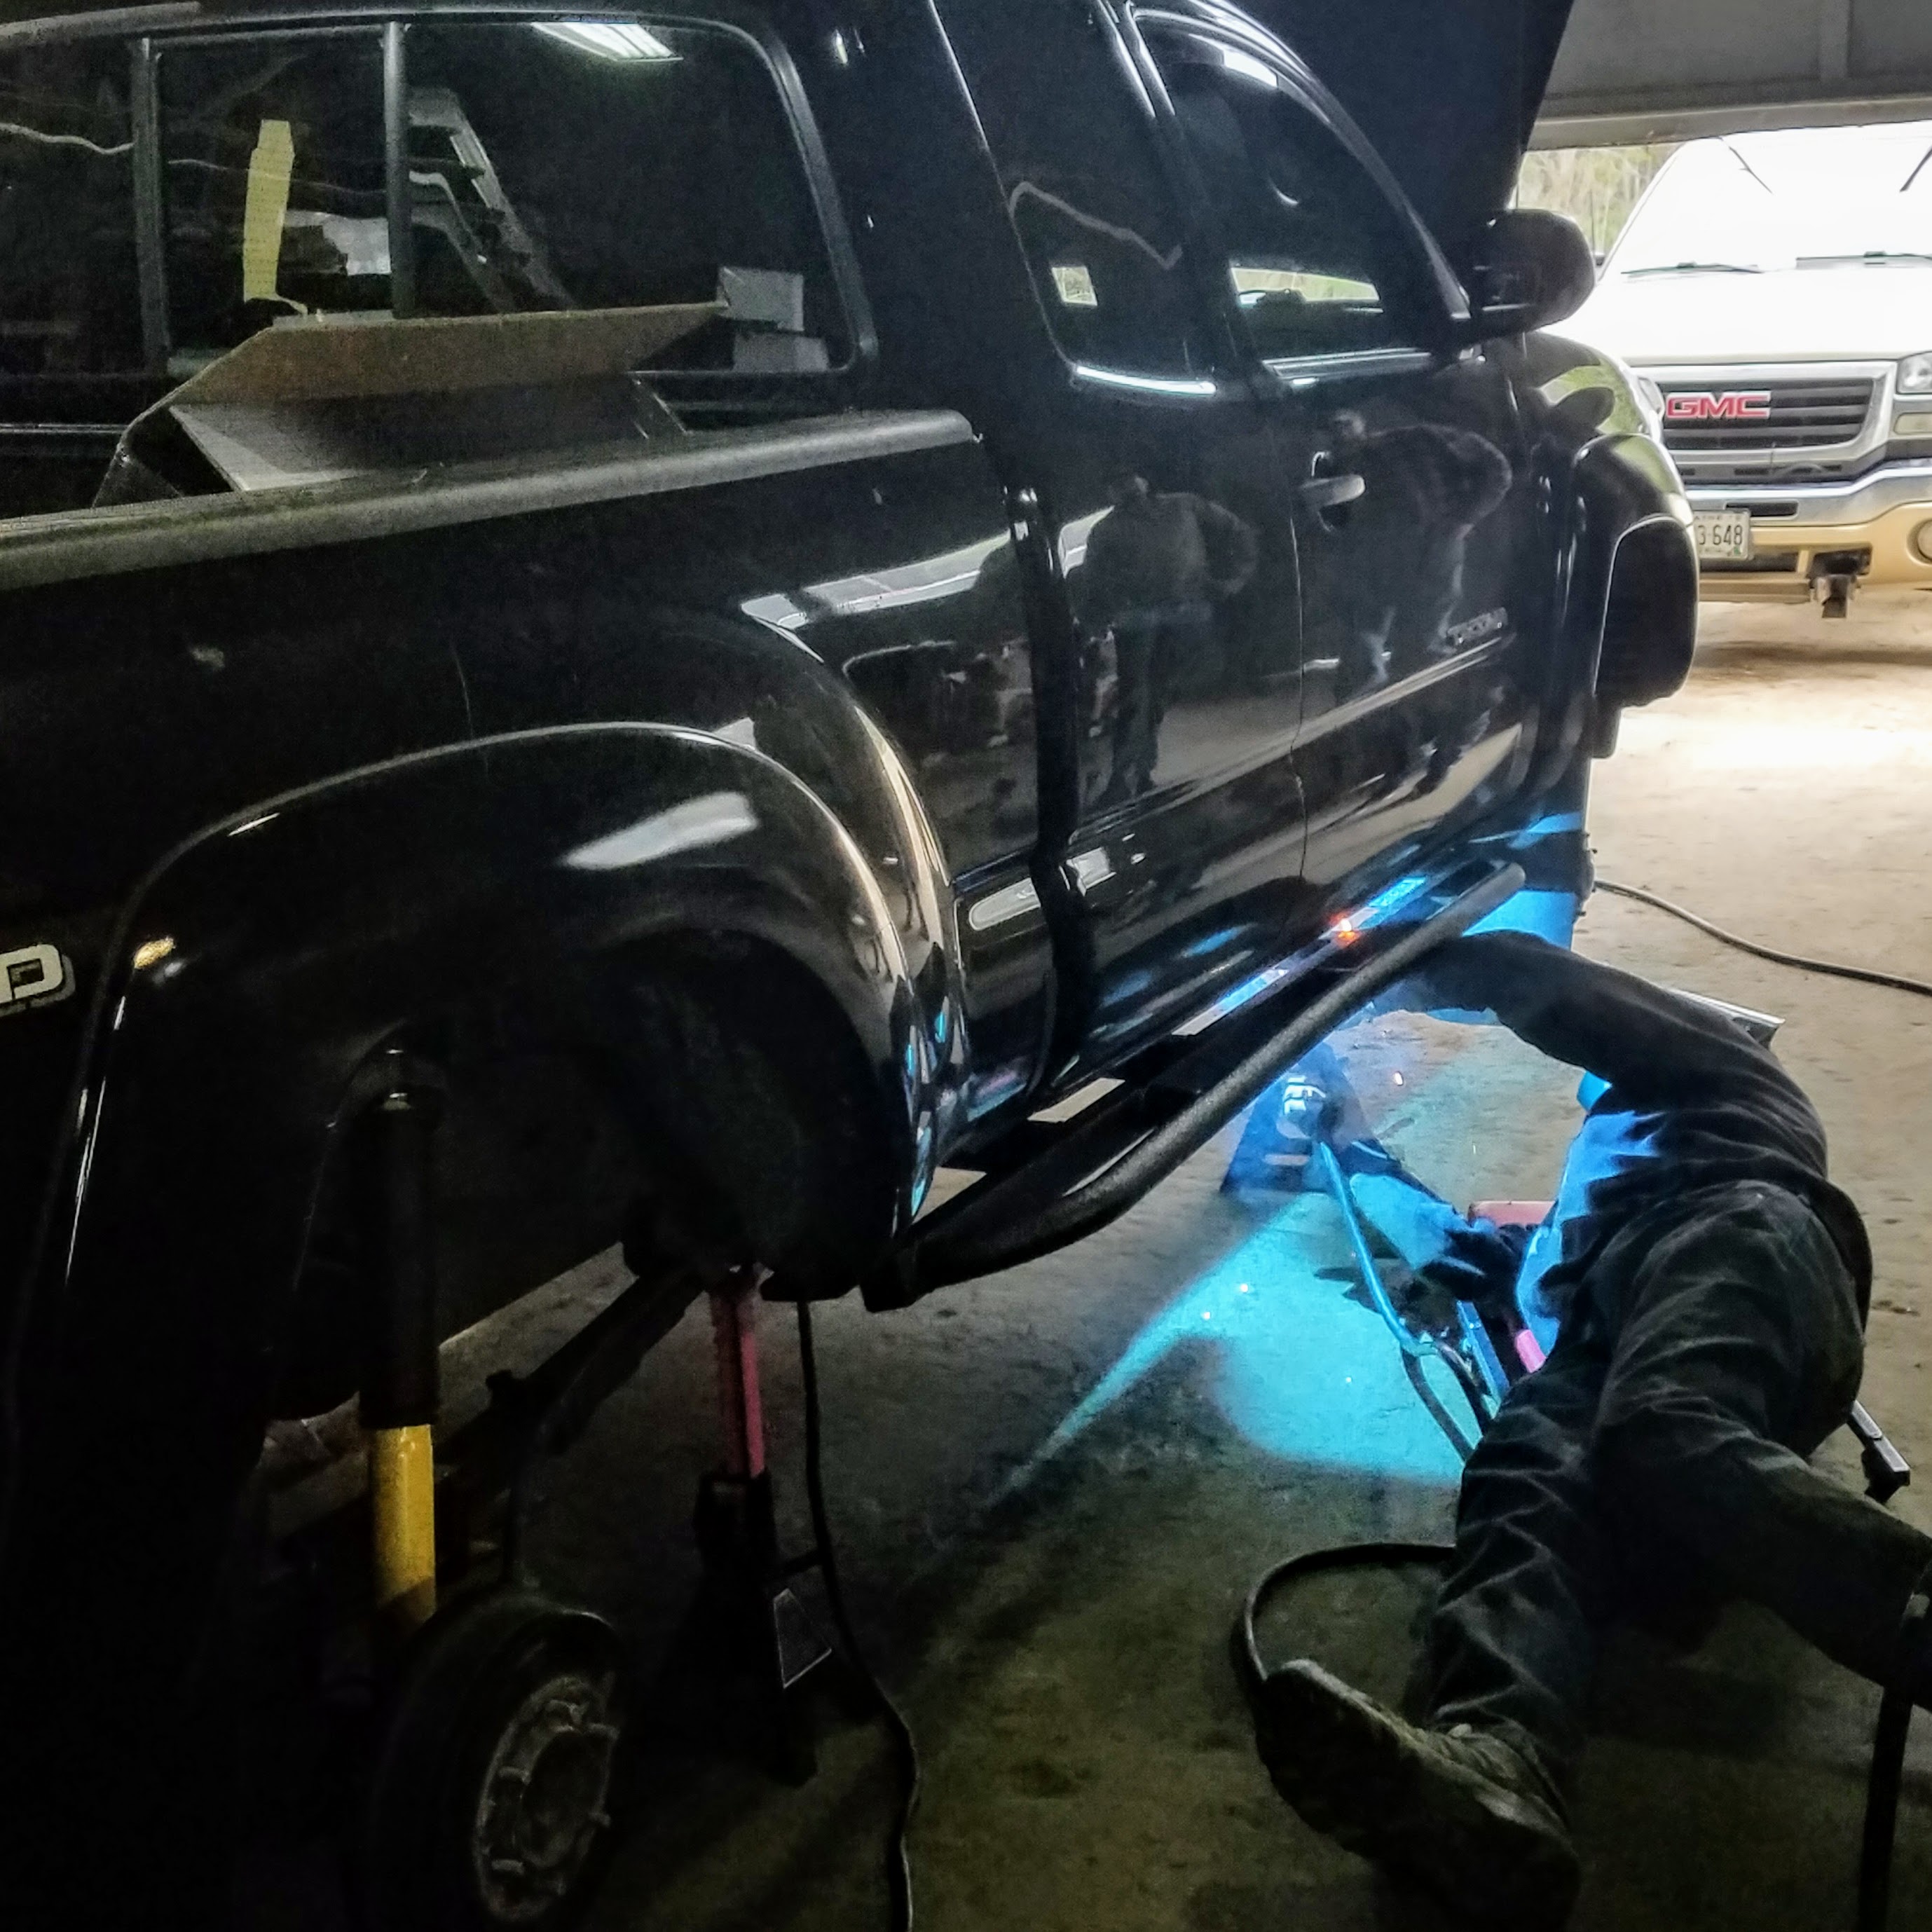
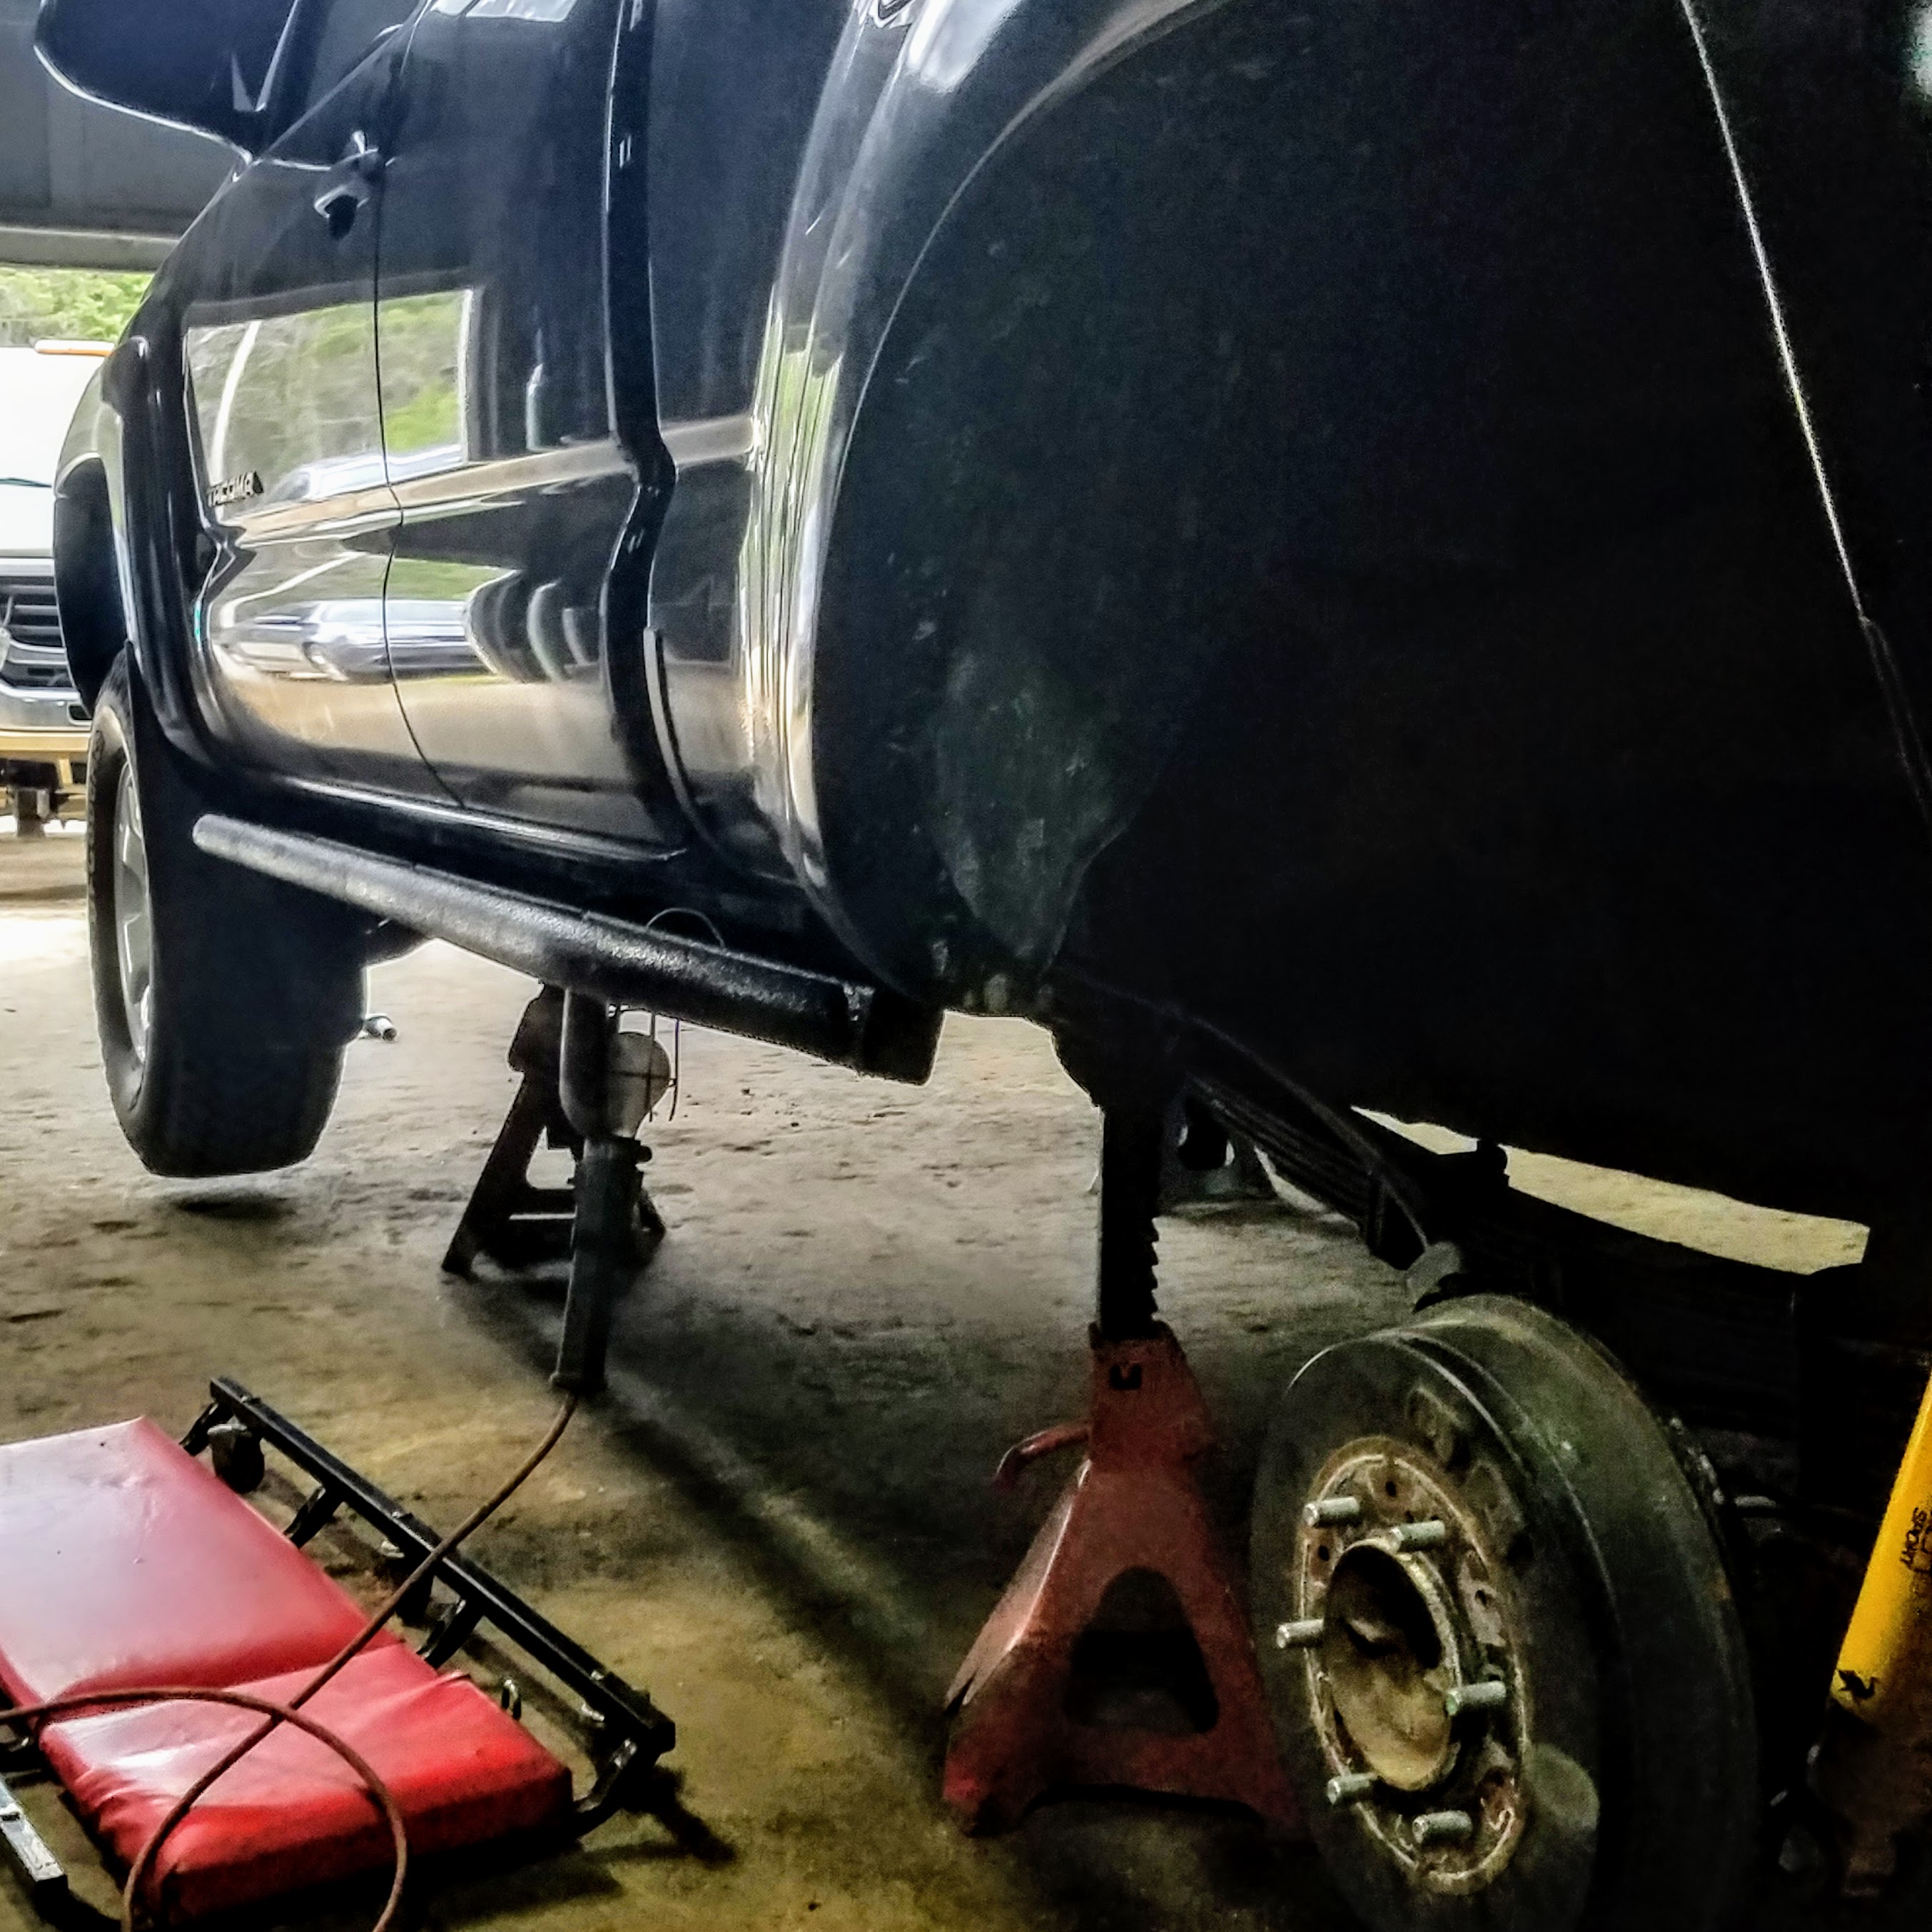
Rock sliders were a new concept to us when we started planning the truck. In theory, they are load bearing “running boards” that stretches between the tires outside the body panels. They allow the tires to fall off of rocks when crawling and prevent the truck from landing on a rock with the weight on the frame rail or body panels.
We bought the sliders for a slightly different purpose, as we never intended to be doing any rock crawling. They make a good step up into the cabin and more importantly, protect the exterior of the truck. I never saw any research or stories validating my assumption, but heavy-duty steel pipe welded to the side of the frame should undoubtedly reinforce the truck when it comes to collisions. Whether we were to get sideswiped or a full on accident, the hope is that sliders will provide enough armor to prevent significant injury inside the cabin or to the body.
There are two types of sliders: bolt-on and weld-on, and, at the advice of the crew at Pelfreybilt, we opted for the weld-on variation. After a little bit of prep work to sand off some paint, the installation was a pretty easy two-person job. One person held the slider in place, and the other ran the welder. Easy peasy!

Skid Plates:
Low cost and hopefully, high reward. Steel skid plates are designed to let the truck slide off rocks when you’re doing technical off-roading. Aluminum skid plates are designed to protect the undercarriage but can puncture or deform when impacted.
We installed one aluminum skid plate to protect the oil pan from a front impact. The idea is that if we ever run into anything that hits the skid plate, it will protect the oil pan from puncture. If we’re bouncing rocks off the oil pan, it’s time to turn around and find an alternate route, as the wear and tear on the truck wouldn’t be worth it!
Installation only took about an hour, especially with everything already off for the front bumper. A few 18mm bolts were really all that we needed to take out to swap the factory stamped steel plate with the Pelfreybilt aluminum skid.

Thoughts looking back:
Despite being out of business, I can’t complain at all about the products from Pelfreybilt. It’s a shame they are gone, as they really make a great product. The truck is heavier overall than we wanted it to be by about 750lbs and the armor is heavy. Fortunately, the front bumper is aluminum, but the rear bumper with a swing gate and sliders is a lot. We probably could have saved money and weight by not going with heavy duty sliders – although they are handy to step on!
